Insulating your garage is one of the best ways to save money on energy bills and keep your home comfortable.
The garage is often used for more than just storing the car, seasonal items, tools, and lawnmowers.
Many people take advantage of the extra space to create a functional workshop, mudroom, entertainment area, or another kind of use.
However, in the middle of a hot summer, the garage can quickly turn into a giant oven that becomes more uncomfortable as the temperature rises. In addition, it may be too cold to properly use in the winter, even with the best space heater for the garage.
Insulation helps prevent heat flow into and out of the space, keeping it cool in the summer and warm in the winter.
It also can lessen exterior noise, like traffic or loud neighbours. Insulating an unfinished garage can be a relatively simple task for experienced DIYers.
Common types of DIY insulation for this job include fibreglass batts and rigid panels, with most people preferring the simplicity and affordability of fibreglass.
However, rigid panel insulation is a more effective insulator than fibreglass, making it a better option for hot or cold climates.
Spray foam insulation also can be used, though it typically costs more than either fibreglass batts or rigid panel insulation, and it’s more challenging to install.
If you want to insulate your garage but don’t know where to start, here we provide a roadmap to enhance your doors, walls, and ceiling. Garage Storage Solutions features an innovative wall system with heavy-duty sliding wall components such as hooks, garage shelving and stylish, durable steel cabinets designed to hold your gear securely and neatly in place.
Benefits Of Insulating A Garage
The goal of insulation is to insulate or protect something with a heat- and sound-resistant material, the inside of the garage from the world’s harshness outside.
It keeps it hot inside when it’s cold outside and cold inside when it’s hot outside. The key benefits include:
- Prevents air leakage
- Stops heat transfer
- Saves energy costs
- Temperature regulation
Types Of Insulation
There isn’t just one type of insulation, despite what big box stores and their name-brand insulation would have you believe. Let’s dig in.
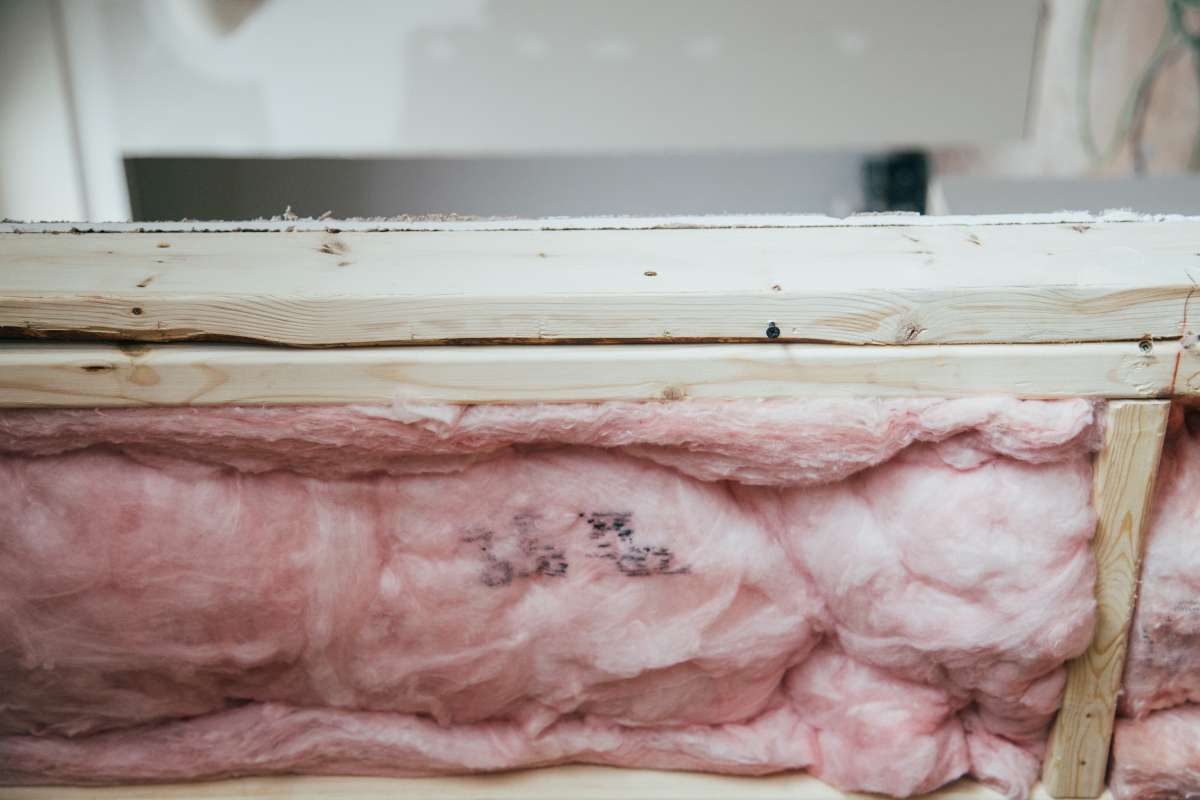
Blankets (Batts And Rolls)
The most common type of insulation is seen in the form of batts or rolls, generally called blanket insulation.
The main difference is a batt is a pre-shaped and cut rectangle, while a roll of insulation comes wrapped up.
Loose Fill
Unlike blanket insulation, loose-fill has no shape, as it resembles the stuffing from inside a teddy bear. It is typically blown into spaces on top of a barrier and is excellent for filling odd shapes or spaces.
Sprayed Or Foam-in-place
One of the easiest methods, spray or foam insulation, is spread over and throughout areas by shooting the wall like a hose.
Rigid Insulation
Added to the frame of the building, rigid foam insulation boards are typically used when remodelling or building a house.
Reflective Insulation
As the name suggests, reflective insulation reflects heat. As a result, it helps cut down on downward heat flow.
Radiant Barrier
A radiant barrier is made to keep spaces cooler, with unique designs that protect against consistent, intense sunlight.
Before You Begin
Insulating the garage is typically most accessible when the studs of the garage are exposed instead of covered with drywall.
Suppose the studs are already covered with drywall, but the gap between the studs isn’t filled with insulation. In that case, it may be a good idea to consider having a professional use spray insulation to fill these gaps, so only minimal damage is done to the drywall.
What You’ll Need
Your equipment will depend on your insulation type. While we can recommend different options, you need to determine the proper material to insulate your garage.
Here’s a list of all the materials and tools you’ll need for insulating a garage to the same standard as a professional contractor:
Fiberglass Insulation
The most common type of insulation comes in rolls or batts, also known as blanket insulation. A bat is a pre-formed rectangle, while a roll wraps up like a tube of wrapping paper.
You can also find loose-fill, reflective, and foam board insulation.
Garage Door Insulation Kit
You don’t need a garage door insulation kit, but it will make your life easier. The kits take little time to install and can save you a fortune on cooling and heating costs.
Foam Insulation
You’ll need to spray foam insulation to fill gaps and cracks in your garage. Expanding foam fills the crevices to prevent unwanted moisture from getting in and heat and cold air from escaping.
Drywall
Drywall provides a final layer to keep your insulation in place. Measure your garage’s linear feet and multiply them by height to determine how much material you need. We recommend buying extra drywall just in case.
Gloves And Long Sleeves
Fibreglass insulation can cause rashes and inflammation if it comes in contact with your skin. Wear gloves and long sleeves to avoid irritation.
A Utility Knife
A sharp, high-quality utility knife will make cutting insulation materials effortless.
Wood
Wood serves as a guide on top of the insulation, making it simple to shape insulation to the proper size.
A Staple Gun With Staples
Staples are the leading DIY choice to hold the insulation securely in place.
A Tape Measure
A tape measure (ideally 8ft plus) will give you precise cutting lines and panel sizes.
How To Insulate A Garage Wall
Tools & Materials
- Hammer
- Screwdriver set
- Pry bar
- Masonry sealant
- Caulking gun
- Fibreglass batts
- Rigid panel insulation
- Utility knife
- Vapour barrier
- Staple gun
- Drywall
Before You Begin
Insulating the garage is typically most accessible when the studs of the garage are exposed instead of covered with drywall.
Suppose the studs are already covered with drywall, but the gap between the studs isn’t filled with insulation. In that case, it may be a good idea to consider having a professional use spray insulation to fill these gaps, so only minimal damage is done to the drywall.
Remove Anything Mounted To The Walls.
Nails, screws, and hooks are commonly installed on the wood studs so that lawn tools, ladders, and other objects can be mounted on the walls when they aren’t being used.
A hammer, screwdriver, or pry bar is typically all you need to remove any hooks, nails, screws, or any other fasteners or objects that may be mounted to the garage walls to get access to the bare studs of the structure.
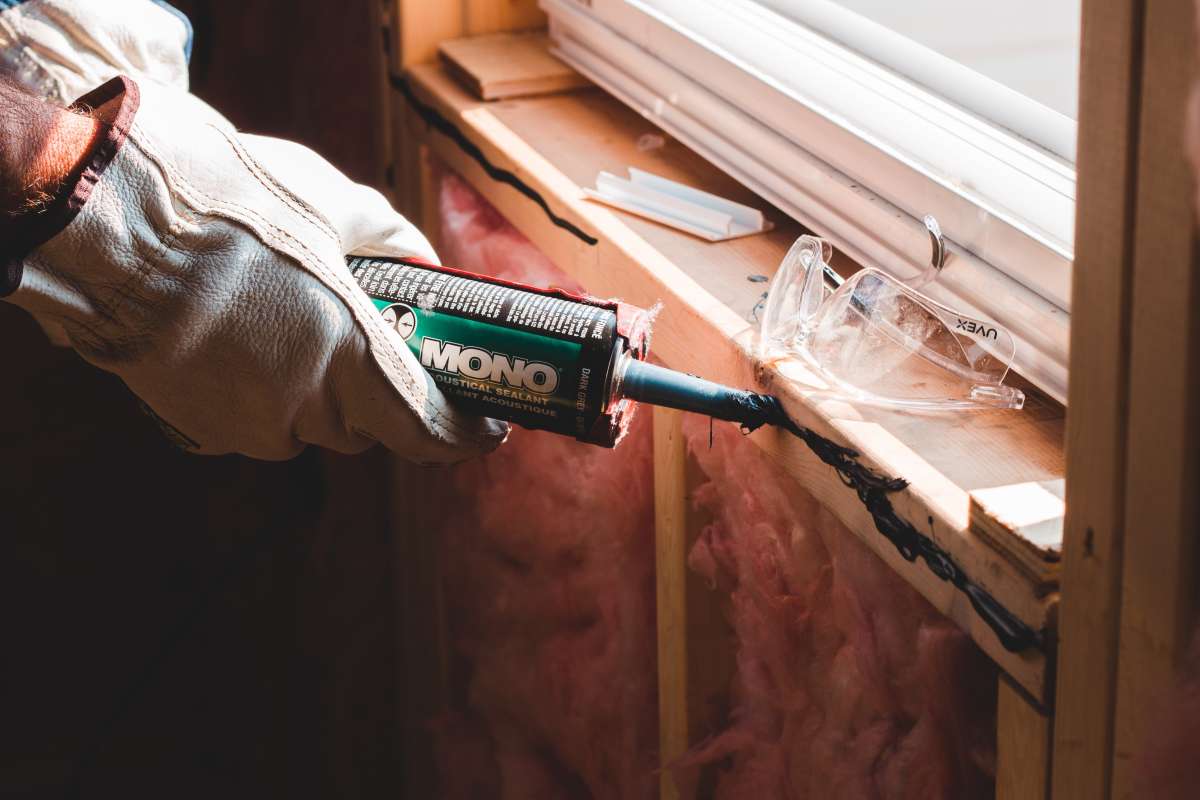
Seal Any Cracks Or Gaps Along The Exterior Wall.
Inspect the outside of the garage and the inside of the garage to detect any cracks or gaps along the exterior walls.
It’s also a good idea to determine if there are any cracks or gaps in the wall shared with the home.
These narrow crevices can allow insects and other pests to invade, and water also can cause the gap or crack to expand while contributing to mould growth and ongoing water damage inside the garage.
Apply waterproof masonry sealant with a caulking gun to seal any cracks, holes, or gaps.
Allow the sealant to dry and cure according to the manufacturer’s directions before installing insulation.
Grab a can of foaming insulation and shake it vigorously. Next, attach the straw to the nozzle and spray the insulation in the desired area.
Use enough foam to fill 50% of the area since the insulation will expand to occupy the rest of the space.
Give the foaming insulation five to 15 minutes to harden.
You can continue adding more foam once the first layer is tack-free. The insulation will take up to eight hours to cure.
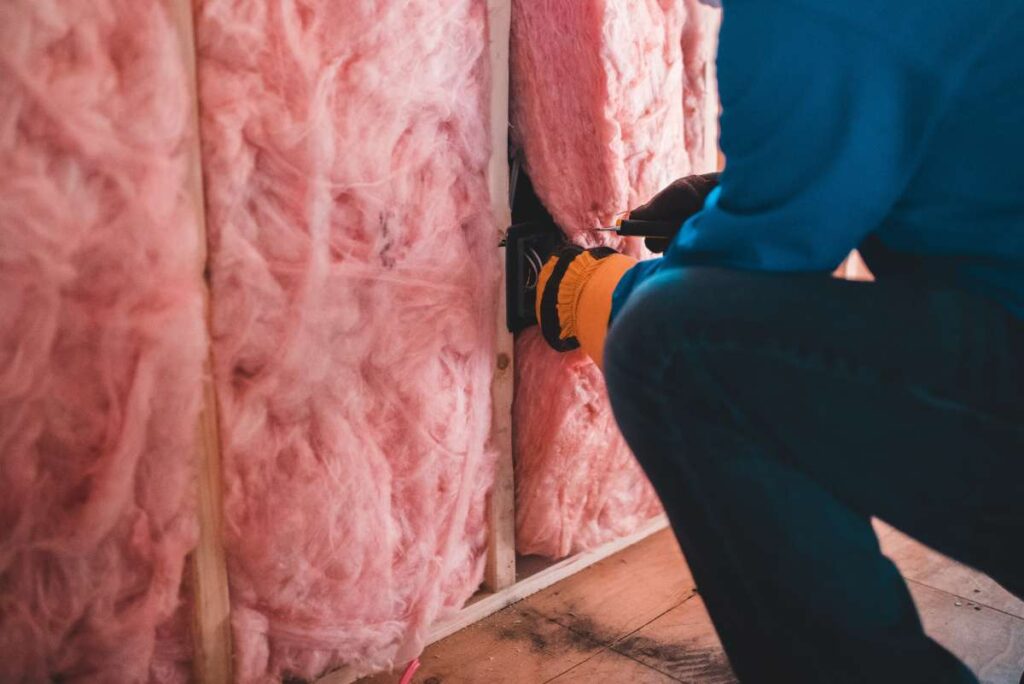
Install Batts Of Fiberglass Insulation Between Wall Studs, Cut To Fit Awkward Spaces.
You can begin installing the insulation when the walls are properly sealed and clear of any nails, screws, hooks, or mounted items.
Fibreglass batts and rigid panel insulation are the most commonly used options due to their versatility and affordable price.
Fit the insulation into the gaps between the wall studs and use a sharp utility knife to cut the insulation to the correct size instead of forcing the insulation to fit the space.
Applying a vapour barrier on the warm side of the insulation helps protect the insulation, the studs, and the exterior wall from issues caused by excess moisture like rot and mould growth.
In temperate climates, the vapour barrier is applied over the insulation on the room side by stapling the vapour barrier to the wall studs.
However, the vapour barrier mustn’t be damaged because any holes can trap moisture and lead to problems inside the walls.
Don’t Forget The Ceiling And Garage Door.
After installing insulation to the garage walls, there are still two more surfaces that should be insulated to block outdoor noise and reduce the flow of heat into or out of the garage.
The ceiling can typically be insulated in essentially the same way as the walls. However, you will likely require at least two people, one up on a ladder and the other nearby, to hold insulation, pass tools, and support the ladder.
The garage door follows a slightly different insulation method because it doesn’t have wooden frames to help secure it.
Instead, adhesive retainer pins are applied to the garage door.
After cutting the insulation to the correct size for each garage door panel, push the insulation into place over the retainer pins, then secure the insulation with snap-on retainer pin caps. Garage Storage Solutions features an innovative wall storage system with heavy-duty sliding wall components such as hooks, garage shelving and stylish, durable steel cabinets designed to hold your gear securely and neatly in place.
Install Drywall.
With the insulation installed and the vapour barrier in place, the job is done, and the garage is now insulated against exterior temperatures.
However, space could still look better with finished walls.
Measure the walls and ceiling to determine how many sheets of drywall, how much tape, and how much drywall compound is needed to transform the room into a finished space.
Then, put together a basic plan for the layout. After checking all of the measurements, begin hanging the drywall.
Secure the pieces of drywall to the studs of the garage using drywall screws, continuing until all of the walls and the ceiling are completely covered.
Tape and mud the drywall, then sand the drywall compound (mud) to get a smooth surface. Finally, the walls can be painted to finish this update to the garage.
How To Insulate A Garage Door
Garage doors require slightly more experience when installing insulation. However, this DIY option utilises some of the same tools and only takes one or two days to complete.
If you don’t have the proper equipment or expertise, consider hiring a garage door service company.
Install The Retainer Pins
Use a tape measure to find a spot one foot from each side of your garage door panel and one halfway between the rails.
Mark the locations with a pencil. Centre the markings vertically and note the subsections.
Remove the adhesive from the retainer pins. Press the base onto the door panel. Repeat this process for each marking on the board.
Cut The Foam Board Insulation
Cut the foam board to the desired length. Some types of garage insulation come in pre-cut slabs, so you don’t have to adjust them.
If you need to cut the materials, roll out the insulation vinyl side down, measure it with a ruler, and cut it with a utility knife.
Remember that no two garages are the same.
Measure the insulation individually, making sure that it matches the panel length. Then, place the insulation on a hard surface, such as concrete or plywood, to ensure a crisp cut.
Secure The Insulation In Place
Center the garage door insulation with the panel. Once you have it in the right place, press it against the retaining pin.
The insulation will stick to the garage door when the needle pierces the vinyl seal. Repeat this process until all the panels on your garage door have insulation.
Apply The Vinyl Weatherstripping
Place the vinyl weatherstripping along the garage door edge. It should form a 45-degree angle.
Once it’s in the correct position, flush with the garage floor, partially nail or staple the weatherstripping into the garage door.
Make sure the weatherstripping can hold up to brisk gusts.
Apply pressure to the garage door’s exterior and move the doorstop inward until you create a firm bottom seal.
If the gaps between the weatherstripping and garage floor aren’t uniform, readjust the material.
Begin at the top of your garage door. Replicate the effect of strong wind, then pound the nail or staple it into place.
Continue this process, working your way along the edge of the garage door until you reach the bottom.
Not sure if your weatherstripping is in the right place? Turn off the lights and shine a light under the garage door.
You shouldn’t see lighting peaking through the bottom space. You may need to replace your garage door hinges or adjust the spring tension.
Add The Bottom Seal Track Slots
You’re in the home stretch. Your insulated garage door has the sides and back in place.
Now you need to secure the final space: the bottom seal. Start by removing the bottom seal track slots with a flathead type of screwdriver.
Use your utility knife to remove extra vinyl and fasten the ends with pliers. Remember to crimp each side of the vinyl seal. Securing this area will prevent the materials from cracking.
Check Your Garage Door Insulation
After you finish your garage door insulation kit, it’s time to test your work.
A properly balanced garage door should remain in place when you lift it halfway. If the door falls, it doesn’t have the optimal balance.
An unbalanced garage door can damage the rest of your garage. In addition, it will strain your garage door opener and let cooled air seep out of your home.
Homeowners that don’t have the proper tools should consider contacting a garage door service company to calibrate the spring tension.
What Is The Best Insulation For A Garage?
Due to its solid R-Value, wide availability, relatively low cost, ease of installation, and relatively unmessy nature.
What Factors Should I Consider When Deciding Whether Or Not To Insulate My Garage?
If you’re using a heater or an AC unit in the garage, insulation can make a big difference in maintaining a comfortable temperature.
If you’re not using any additional heating or cooling, the insulation won’t offer much of a benefit.
Bottom Line
An insulated garage door can transform your living space. It can reduce your energy bills and protect your house against Mother Nature while keeping the interior temperature on point.
A little cellulose, drywall, and elbow grease can also enhance your property value. You don’t need to be a master craftsman to tackle an insulation installation.
Insulation kits can save you time and money on your next endeavour, with some home centres even letting homeowners rent equipment. Are you getting frustrated by your clutter and garage organisation? Here at Garage Storage Solutions, we offer extensive professional organising and declutter service.